The Portfolio of Kaiser Islam
Blender
Independent venture to learn more about 3D modelling
Summary
For those who are unfamiliar, blender is an open-source software used for 3D modelling, animation and video effects, just to name a few of its capabilities. This can range anywhere from realistic models of everyday objects to movies and animation. One can also import free 3D assets from the internet and use them in projects so that they don't have to model every little detail. Although blender is not a traditional software used in the civil engineering industy, it is a nice tool that one can use as a creative outlet and model different ideas before pitching the best one.
I decided to learn about the software during the COVID-19 pandemic and we were in a lockdown. After learning the basics of AutoCAD and SketchUP, I became more interested in 3D modelling, and particularly software outside of engineering. This was because I wanted to expand my skill set to go beyond just engineering and develop myself in other areas. To do so, I followed a few tutorials and have finally started my first independent project.
Current Project
1 Bedroom Apartment
My current project is an apartment room, which will be my first original project (with some help in setting up basic rooms). I'm currently in the process of learning about and creating an efficient floor plan, to ensure that the apartment is as realistic and functional as possible. Check back for any updates and images!
Past Projects
Zanotta William Couch
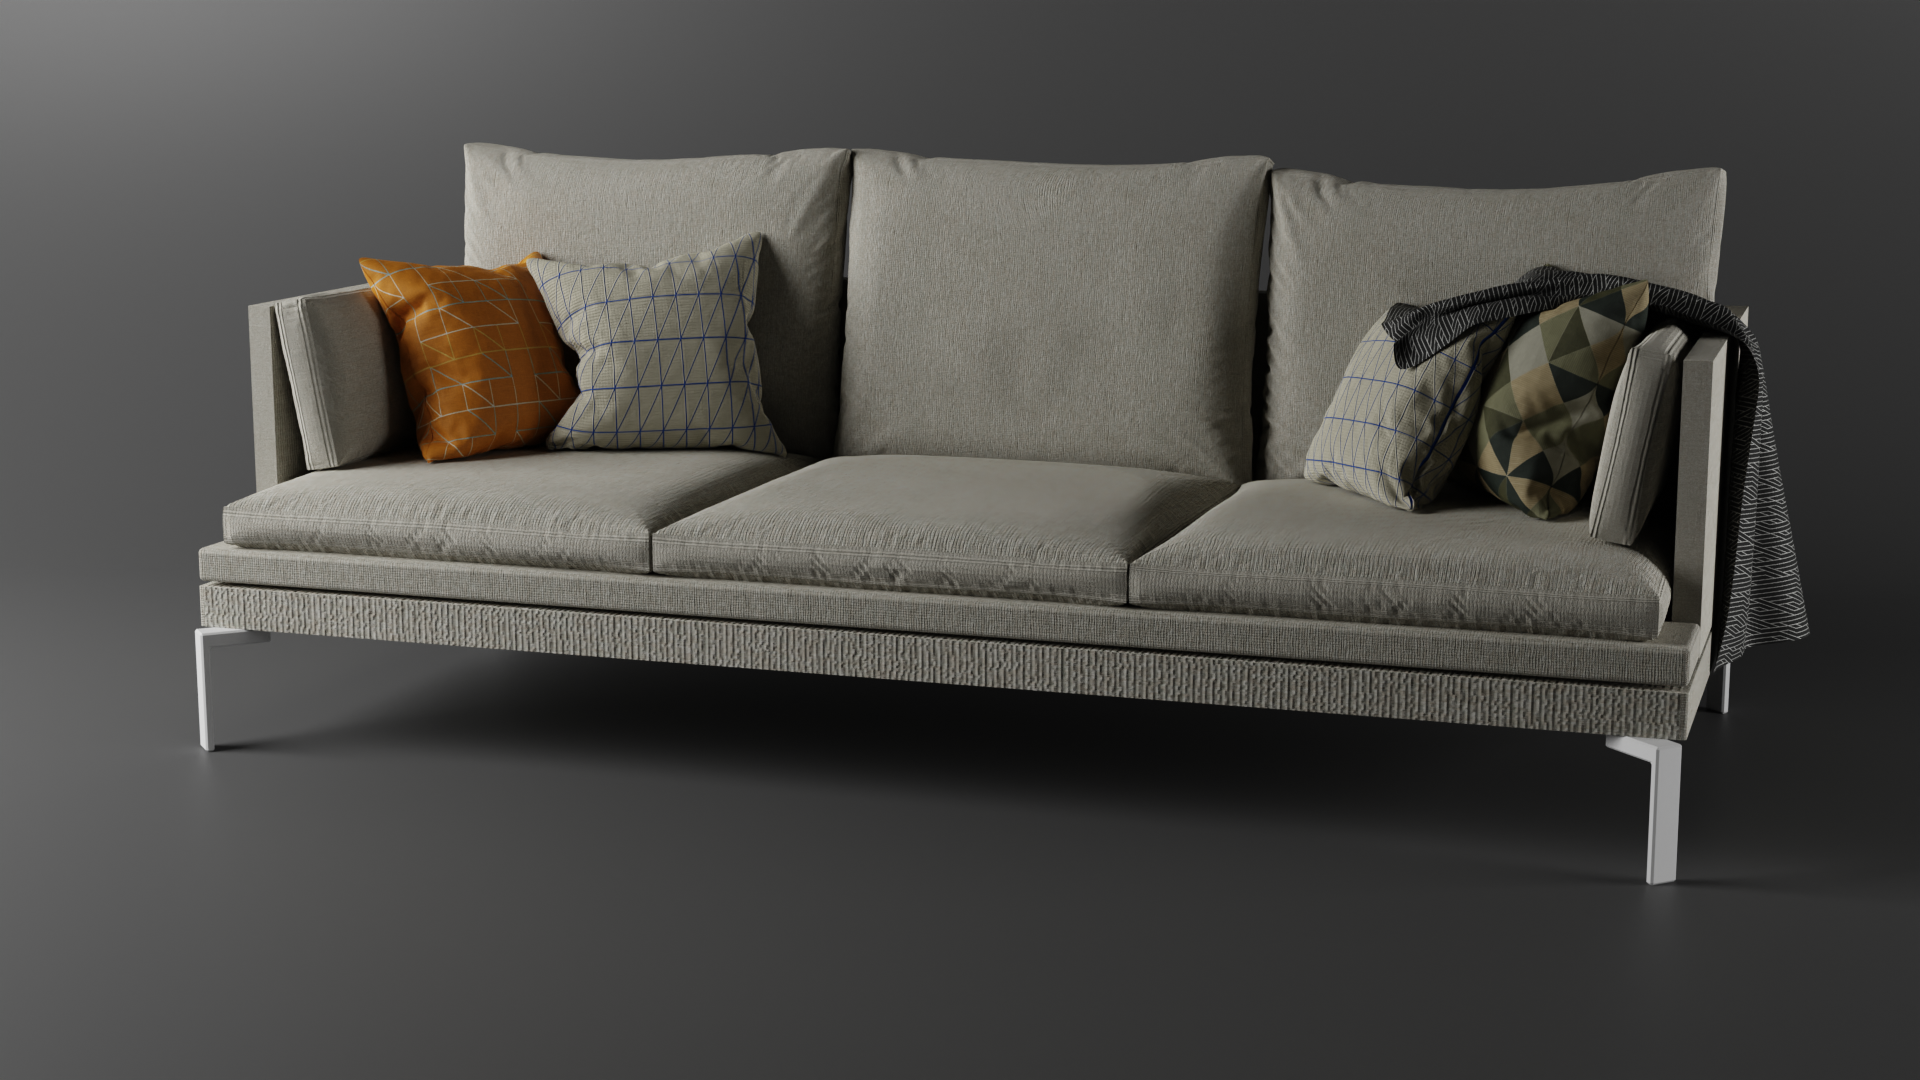 The latest project that I finished was recreating this couch from Zanotta using a tutorial. The couch can originally found at the Zanotta Website, where you can also find the blueprints from which to model from. This was also the first project where I explored the physics tab, specifically cloth simulations. Using these simluations, I was able to generally figure out how various aspects of the tab worked, such as pressure and gravity.
I also messed around with the collisions tab and figured out how to reduce the gap between two objects colliding and reducing the friction between two objects. This was also the first time working with multiple UV maps on the same object; the side pillows and back seating both had seams on the sides, which was introduced via another texture map in addition to the main fabric texture like the rest of the couch. The pillow and blanket textures can be found at poliigon.com
The latest project that I finished was recreating this couch from Zanotta using a tutorial. The couch can originally found at the Zanotta Website, where you can also find the blueprints from which to model from. This was also the first project where I explored the physics tab, specifically cloth simulations. Using these simluations, I was able to generally figure out how various aspects of the tab worked, such as pressure and gravity.
I also messed around with the collisions tab and figured out how to reduce the gap between two objects colliding and reducing the friction between two objects. This was also the first time working with multiple UV maps on the same object; the side pillows and back seating both had seams on the sides, which was introduced via another texture map in addition to the main fabric texture like the rest of the couch. The pillow and blanket textures can be found at poliigon.com
Fredericia Søborg Chair*
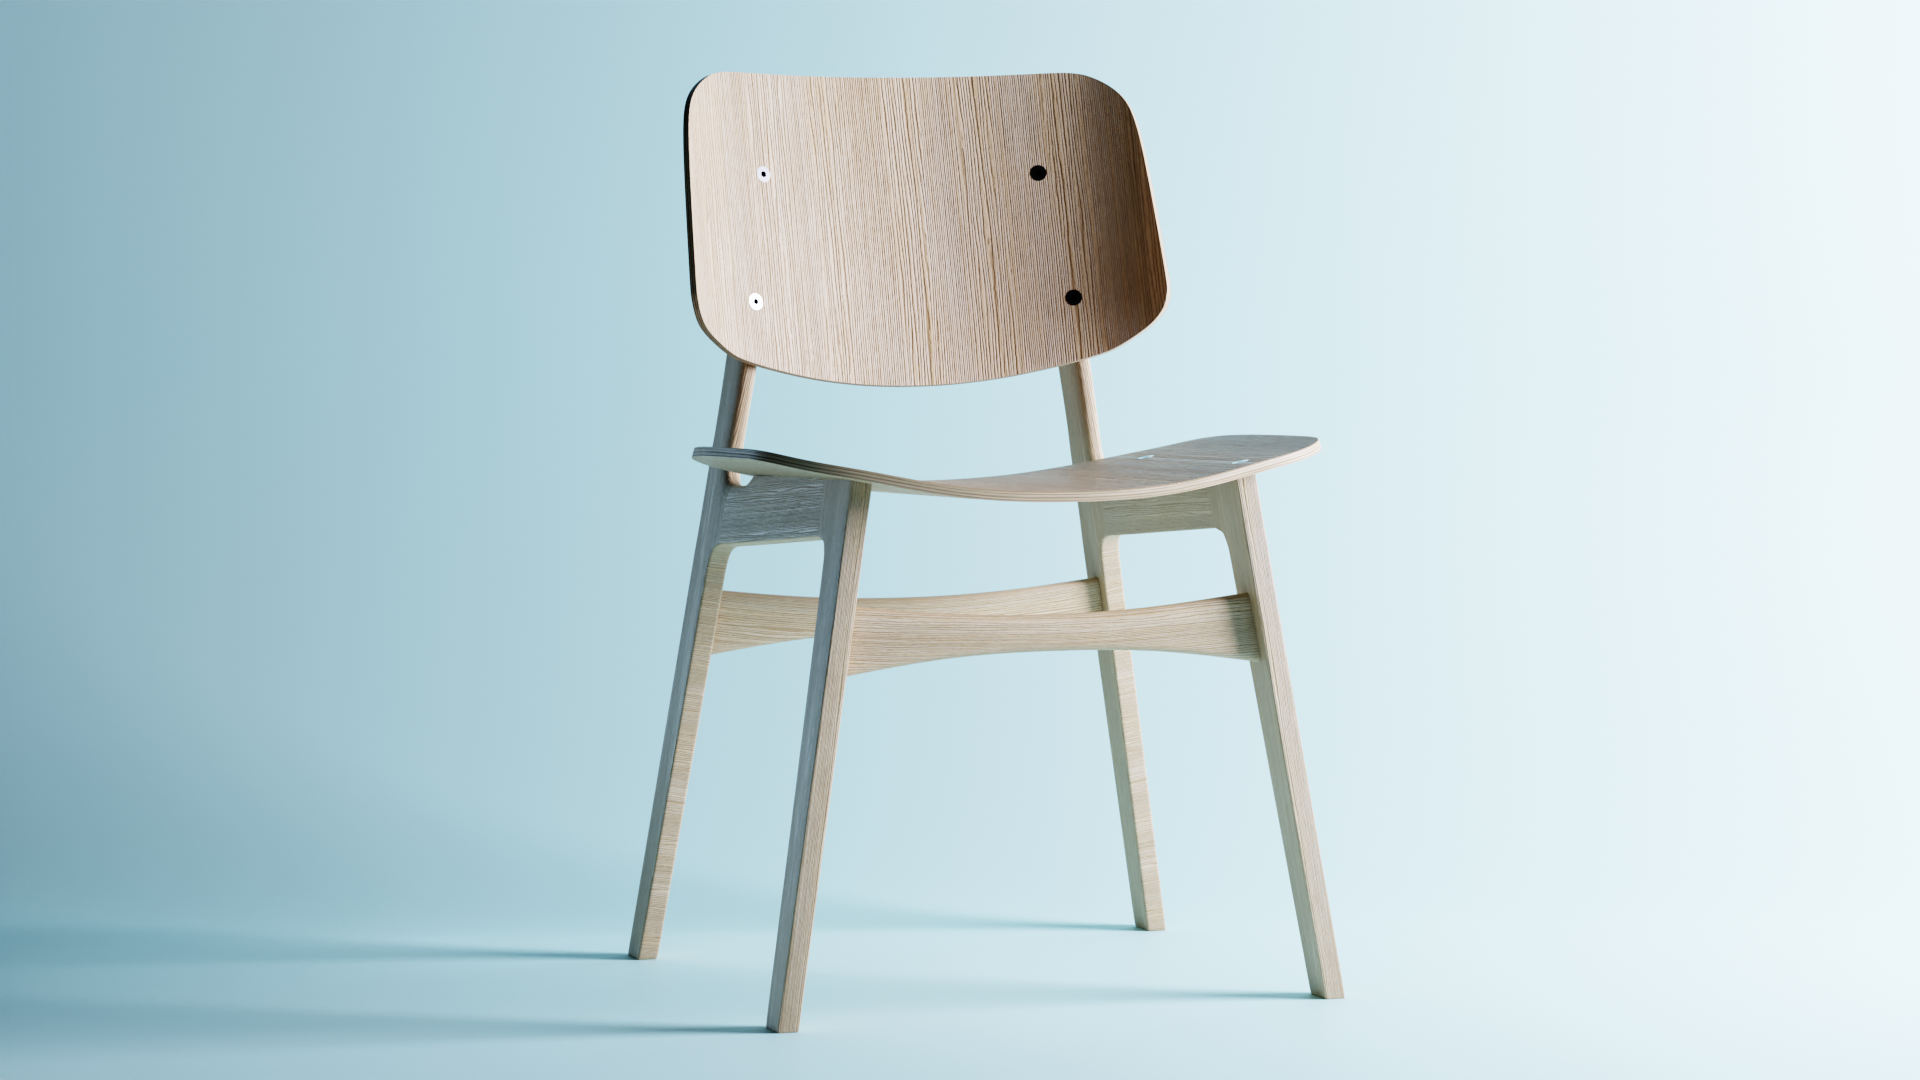 The Søborg chair is the first project where I modelled something with existing blueprints, which can be found at the Frederecia website. This model came from a tutorial which outlined the basics of modelling an existing object, which explained how to create a cooperative mesh, setting seams for UV unwrapping so that they aren't obvious and edge flow. One of the trickiest parts of this whole project was creating the backrest and
modelling curved surfaces in general. The backrest was quite difficult due to its rotation, which quickly became an issue when looking at the blueprints provided. If the backrest was modelled via the front and top, it wouldn't look right from the side. To resolve this issue, I modelled it straight on (no rotation) and then rotated it to match the anlge on the side. Though I couldn't replicate it exactly, the difference aren't major and the curve still remains smooth enough to act as a backrest. I also learned a bit about how to set up studio lighting. This includes
creating an infinite background (creating a plane, extruding it and creating bevels), creating a dual lighting system to highlight certain parts of the chair and introducing ambient occlusion to make shadows more realistic.
The Søborg chair is the first project where I modelled something with existing blueprints, which can be found at the Frederecia website. This model came from a tutorial which outlined the basics of modelling an existing object, which explained how to create a cooperative mesh, setting seams for UV unwrapping so that they aren't obvious and edge flow. One of the trickiest parts of this whole project was creating the backrest and
modelling curved surfaces in general. The backrest was quite difficult due to its rotation, which quickly became an issue when looking at the blueprints provided. If the backrest was modelled via the front and top, it wouldn't look right from the side. To resolve this issue, I modelled it straight on (no rotation) and then rotated it to match the anlge on the side. Though I couldn't replicate it exactly, the difference aren't major and the curve still remains smooth enough to act as a backrest. I also learned a bit about how to set up studio lighting. This includes
creating an infinite background (creating a plane, extruding it and creating bevels), creating a dual lighting system to highlight certain parts of the chair and introducing ambient occlusion to make shadows more realistic.
Donut Animation
 The very first project which I undertook was, as expected, a tutorial outlining most of the basics of blender. As can be seen, I followed the donut tutorial from Blender Guru on Youtube. The tutorial went over everything from modelling to sculpting to keyframe animation. I learned how to create models in blender, both from scratch (the donut and the plate) and from a reference image (the cup). The tutorial also went over sculpting and texture painting, which helped give the donut it's realistic features,
such as the icing and the indented middle band going around the donut with a ligther shade. I also learned about nodes in the shading tab and used it to make the donut more lifelike, by using mixRGB nodes to play around with the colour and multiple displacement nodes to add bumps. Additionally, I imported a couple of textures from poliigon.com for the background and marble table to emulate the look and feel of a cafe. Finally, I added some lighting and created an empty axis on the donut to focus the camera on. This allowed
me to start with the donut and plate out of frame and rotate it into view and change the focus of the camera. To create the animation, I used keyframes, rendered and image sequence and put it together in blender's video editing tab.
The very first project which I undertook was, as expected, a tutorial outlining most of the basics of blender. As can be seen, I followed the donut tutorial from Blender Guru on Youtube. The tutorial went over everything from modelling to sculpting to keyframe animation. I learned how to create models in blender, both from scratch (the donut and the plate) and from a reference image (the cup). The tutorial also went over sculpting and texture painting, which helped give the donut it's realistic features,
such as the icing and the indented middle band going around the donut with a ligther shade. I also learned about nodes in the shading tab and used it to make the donut more lifelike, by using mixRGB nodes to play around with the colour and multiple displacement nodes to add bumps. Additionally, I imported a couple of textures from poliigon.com for the background and marble table to emulate the look and feel of a cafe. Finally, I added some lighting and created an empty axis on the donut to focus the camera on. This allowed
me to start with the donut and plate out of frame and rotate it into view and change the focus of the camera. To create the animation, I used keyframes, rendered and image sequence and put it together in blender's video editing tab.